How To Use Temporary Pickleball Court Lines To Make A Pickleball Court
A temporary pickleball court is relatively easy to put together, especially if you already have a tennis court or other similar playing surface. All you need is a net and some lines to make your own court.
Temporary pickle court lines can be made with tape or chalk, depending what kind of surface you’re working with and how long you want the court to last. Vinyl ‘EZ’ lines are also available as kits that can be set up anywhere.
Read on to learn more about temporary pickleball court lines, including how to make them and where to put them.
Related: Did you know that a pickleball net is actually not the same height as a tennis net? If you think they’re interchangeable, think again.
Best Materials To Use for Temporary Pickleball Court Lines
The best materials to use for a pickleball court depend on where you’ll be setting it up and how long you want it to last. The most popular options are chalk and tape, and there are many different kinds of chalk and tape to choose from.
Each has its own pluses and minuses.
If you’re looking to go big and actually paint down permanent lines for a pickleball court – read my full guide here.
Indoor Temporary Pickleball Court Lines
Many people choose to make a pickleball court indoors, whether that be in a gymnasium, basketball court, or another large meeting space.
The best materials to use for a temporary pickleball court that’s inside include the following:
- FROGTAPE Multi-Surface Painter’s Tape can be used on hard, thoroughly cleaned surfaces like the inside of a gym.
- Orange masking tape, which has high contrast, can be used to mark lines really well too.
- Eco Walker Court Line Marker Kit will move with heavy use, but is made to be lightly non-skid, and can be used on most indoor surfaces.
- Another court line kit is the Franklin Sports Pickleball Court Marker Kit. It’s a dedicated pickleball kit but doesn’t come with longer sideline and baseline strips.
- Vinyl tape in a bright color like orange, blue or red does a good job of marking the boundary off the court, and is a little longer lasting but still temporary.
- Electric black tape leaves no residue, and so is a great choice for temporary lines on an indoor surface.

Outdoor Temporary Pickleball Court Lines
There are many great places to make a pickleball court outside, from a tennis court to a driveway or even a parking lot – it’s all possible.

The best materials to use for a temporary pickleball court that’s outside depend on which kind of surface you’ll be using, and include the following:
- Sidewalk chalk can be used on virtually all pavement and lasts a couple weeks at maximum; unless of course it rains.
- Big toddler crayons last longer than chalk and work great for thick visible lines on any pavement. I’ve used and done this many times.
- Contractor’s blue #1 chalk, like the Tajima CR202B-P Chalk Rite II Contractor Grade Chalk, makes for a great temporary choice on pavement as well. Make sure not to choose a red chalk though, which has more dye and will take longer to wash away. **Editor’s Note: Two things to note on this product – the chalk or dye is sold separately and the line it makes is one .5mm so it make take a few passes to create a thick enough line.
- Like with indoor courts, green Frogtape works well on hard surfaces like pavement, provided that they’re cleared of debris and don’t have moss, grass, or other irregularities.
- Wilson ‘EZ’ court lines can be used to temporarily set the boundaries of an outdoor court on almost any surface and help set the line of chalk to define the baselines and out of bounds lines further.
- Even using the court line kits mentioned for indoor courts from Eco Walker or Franklin Sports can be used depending on the surface or be used as a template for when chalking or taping the lines down.
- Orange masking tape has high contrast and is a good choice for rubber or pavement.

As you can see, a lot of the same products can be used to make temporary pickleball court lines regardless of whether it’s an indoor court or an outdoor pickleball court you’re trying to make.
I’ve made countless outdoor courts for driveway pickleball and a simple court line kit and some sidewalk chalk easily do the job.
If you’re making a pickleball on a tennis court, whether it’s indoor or outdoor, I’d recommend a court line kit and some tape to clearly establish the out ohttps://thevolleyllama.com/canf bounds lines and baselines.
Trust me, it’ll reduce confusion with the tennis lines that are already on the surface.
A Few Things To Keep In Mind
A pickleball court is 20 feet wide and 44 feet long, smaller than a tennis court. In most cases, this means that it will take 198 feet of tape to draw the lines of a pickleball court.
Pro Tip: Most rolls of tape come with 180 feet of material, so that means that it’ would take more than one roll of tape to make a full pickleball court.
If you use chalk, you’ll need about three chalk sticks per court, and if you use vinyl court lines, you’ll need two sets to make one complete court.
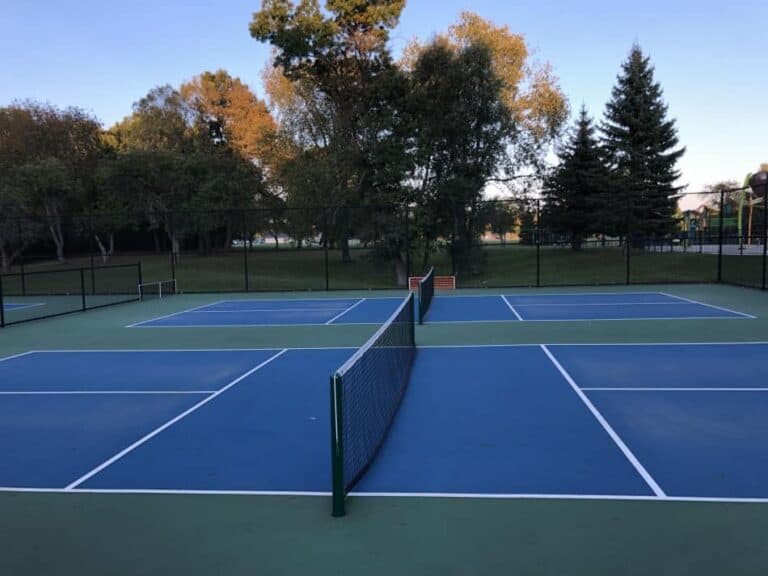
Temporary Pickleball Court Layouts
This allows between each of the pickleball courts and the baseline.
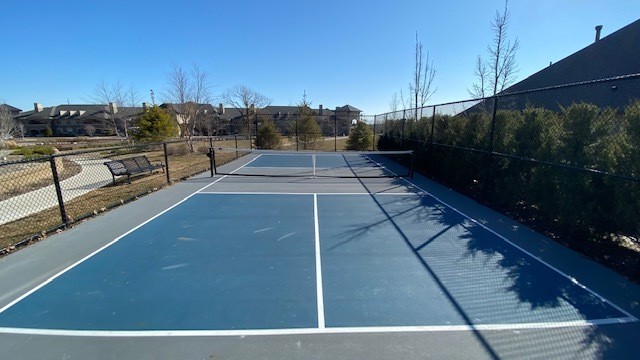
The white lines I made with chalk here don’t stand out enough. Don’t make the same mistake I did, use a brighter color.
Temporary pickleball courts can be set up on a number of surfaces, from basketball courts and volleyball courts to inline hockey rinks.
However, the most common surface to be temporarily repurposed for pickleball is the tennis court.
If you’re setting up a pickleball court or courts on a tennis court, there are a number of different layouts to consider.
One Pickleball Court Per Tennis Court
A simple way to set up a pickleball court is to lower the tennis net by two inches, then tape lines down the side of the court to create a 20 foot by 44 foot rectangle.
You can lower the net easily by tightening the center strap on the net. If this makes the net too tight, you can also adjust the tension with the ratchet on the net post.
Two Pickleball Courts Per Tennis Court
Although four pickleball courts can fit on most tennis courts, some have angled corners that prevent you from being able to fit four full pickleball courts.
In these cases, you can make the most of the space by fitting in two pickleball courts. Here, you can center the two pickleball courts, separating them from each other with the tennis net, which acts as a backstop.
Additionally, you’ll use two portable pickleball nets for each court since the tennis court net is being used to separate the two courts.
The portable net I use and recommend is the Picklenet System because it’s easy to carry and one person can set it up in about 10 minutes.

The Portable PickleNet system is what I use for all my driveway pickleball with family and friends.
Four Pickleball Courts Per Tennis Court
If a tennis court doesn’t have angled corners, you should be able to fit four full pickleball courts in the space of one tennis court. Like with the two pickleball court layout, with four, you can use the existing tennis net as a backstop.
This allows eight feet of space between each of the pickleball courts and the baseline.
Steps For Making A Temporary Pickleball Court
Once you’ve chosen your materials and your location for your temporary pickleball court, it’s time to put it together. Follow these steps to make sure you’re putting together your court in the best way possible:
- First, set up the net. The net should be 34 inches high in the middle, and is the center point for the rest of the court.
- Second, let’s measure the baselines of the court, one at a time. These should be 20 feet long; one on each end of the court. This is where you’ll serve from so the straighter the line the better.
- Once you have each baseline laid out, we’re going to create sidelines by connecting one end of the baseline to the other end of the baseline on the other side.
- Don’t worry, when you get to the mid point where the net is, the net is actually supposed to be longer than the sidelines. The net hanging over the sideline is correct.
- Next we’re going to set up the no-volley zone, measuring out 7 feet from the net on each side. You’ll be at this line a lot, so make it thick and visible! Do this one both sides of net.
- Now, from the middle of the no-volley zone line, lay a line straight up towards the baseline where you serve from. Now, we’ve created the service area. Do that on both sides of the court.
- Now you should have a complete court that measures 20 feet across for the baseline, a sideline that is 15 feet down to the no-volley zone, then the 7 foot no-volley zone line to the net. You should also have another 15 foot service line running down the middle of the court that stops at the no-volley zone. If you’ve got all this on both sides of the net, you’re good to go!
Tips for Making a Temporary Pickleball Court
When you’re making a temporary pickleball court, there are a number of things that you need to keep in mind. See the following list of tips and tricks to make sure that you make the best of your temporary pickleball court:
- Make sure that the courts are oriented north-south. This will prevent sun glare from getting in the way of games.
- If you can’t or don’t want to rent a taping machine, use benchmarks as you measure the lengths of the court to mark the lines where the tape should go before you lay it down.
- Make sure that you choose a spot for the court with plenty of running space outside the boundaries. Ideally, the total open space should be about 30 feet by 60 feet so leave yourself plenty of space if you’re working in a driveway or parking lot. The more space, the better.
- To prevent errors and speed up the process, work with another person while you’re setting up the court.
Temporary Pickleball Court Lines – Conclusion
Temporary pickleball courts can be made on tennis courts, on pavement, or on any other level surface. Creating lines to form the boundaries of the court is relatively simple, and can be done with chalk, tape, or vinyl strips in a pre-made kit.
The right method for you depends on the surface you’re working with and how long you want them to last.
Either way, the point is this. If you’re in love with pickleball and want to bring the game to other people but don’t have a dedicated court – you can still create a pickleball court using my guide that I laid out for you here.
If you’ve got enough room and a hard flat surface, you most likely have a pickleball court waiting to be made. Happy pickleballing!
About Me
I’m just a lover of all sports that involve a racquet, net and a ball. My whole family loves and plays pickleball regularly. I started this website to help give people like you the performance tips and buying info they need to make an educated and informed purchase.
The products I recommend here have been researched, analyzed, compared and in a lot of cases bought, worn and used. If it’s a bad product, I don’t recommend it. Any small purchase made from this site gives me a small commission that helps fund the growth of the site to provide you more helpful information.
Welcome to TheVolleyLlama.com. My name is Keith, I’m just a lover of all sports that involve a racquet, net and a ball. I played competitive high school varsity tennis, love racquetball and my whole family plays pickleball regularly. I started this website to help give people like you the basics to learn these wonderful games.