Building your own ping pong paddle may seem like a difficult task, especially if you’ve never done it before. What equipment do you need? What blade should you select? How do you actually build your own ping pong paddle?
These are questions I asked myself and honestly, finding the answers was a little challenging. So, I watched a ton of videos, read loads of articles, and decided I’d compile my notes and create this helpful guide for anyone looking to build their own ping pong paddle the easy way.
What To Know About Building Your Own Ping Pong Paddle
So, you’ve decided to abandon the standard premade ping pong paddle mold and play with a paddle all your own. Whether you just want to change it for different looks or change the way you play, building your own ping paddle is actually fairly easy to create, customize, and best of all – use.
In this section, we’re going to cover the basic information you should keep in mind. Making a custom paddle requires you to select the different parts that make up a ping pong paddle.

These are the two main parts of paddles. The blade is the skeleton of the paddle, and the rubbers located on the blade determine how the ball travels. The good news is, it’s not overly complicated. With this helpful walkthrough, you can do it!
What Is A Custom Ping Pong Paddle?
Standard ping pong paddles like the Killerspin Jet 800 come with the blade and rubbers as a single assembly. They are designed for a specific style of play and grip with no customization. Custom paddles are different.
A custom ping pong paddle is one made to accommodate an individual player’s style of play and is built to personal specifications and preferences. In short, it’s tailor-made for your play style.
When you build your own ping pong paddle, you can have a thin blade paired with thick rubbers or vice versa. You can also have the handle shaped to accommodate either of the two types of grips: pen or handshake.
Should You Build Your Own Ping Pong Paddle?
Before we go too far, I should point out that there are a few negatives to building your own ping pong paddle. First, depending on the materials used, it can be expensive to make one compared to buying it premade paddle.
Secondly, you have to ensure that your materials fall within the rules of the International Table Tennis Federation.
My take: If you’re not willing to truly make your paddle an investment, then I suggest you find the best possible premade paddle for your style of play and stick with it. If that describes you, then I highly recommend looking through my premade ping pong paddle guide…I’ve compiled the most complete list of premade paddles for literally any skill level across all budgets. If you’ve played with many premade paddles and are eager to go “custom”, then let’s continue.
Getting back to ITTF-approved materials – you’ve got to do your research. For example, your blade must be at least 85% natural wood, and your rubbers can be no more than 2 millimeters thick including sponge and adhesive.
The ITTF requires strict paddle specifications and rightfully so, their job is to make sure there is no serious competitive advantage when it comes to a paddle.
Now let’s take a look at each of the parts of the paddle and discuss how you can customize them to suit your style of play. We’ll start with the blade.
What You Need To Build Your Own Ping Pong Paddle – The Blade
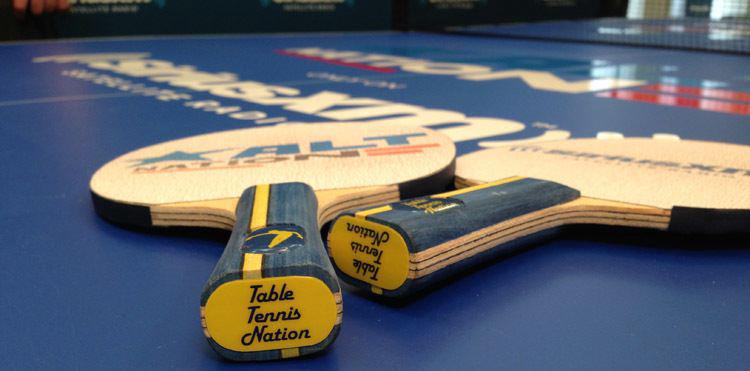
Blades are made of several layers of ply, usually three to seven. Unless you’ve got some pretty advanced equipment, you’re not going to be able to make your own plywood, so you’ll have to stick with prefab. Trust me, leave that part up to the experts.
The different thicknesses of ply will influence how force is transferred from the paddle to the ball.
Thin plywood works best for paddles dedicated to controlling the ball and executing trick shots. This is because they’re flexible and have plenty of “give” to them. These properties of the wood lend themselves well to slower-paced games.
If you’re just batting a ball back and forth across a table casually, keep a lighter blade on hand.

Thick blades, on the other hand, work best for power players. If you use a thicker paddle, odds are you prefer to send the ball blistering across the court at your opponent…So fast, you don’t want your opponent to see it.
It’s similar to the differences between power hitters and place hitters in baseball. For speed, you need something that’s between three-quarters and a full inch thick.
What You Need To Build Your Own Ping Pong Paddle – The Rubbers
Next, let’s consider the rubbers. The rubbers are actually two separate pieces that glue onto the blade. Its purpose is to transmit the energy from your swing to the ball; if you didn’t have good rubber, your paddle will not last very long due to the thinness of plywood and the constant stress it would be under.
Now, here’s the cool part. You’re going to have two different rubbers, one on each side of the paddle. The official tournament rules were updated in 1986 to require the two rubbers to be of different colors: red and black.
In theory, the red side imparts more speed and the black side produces spin. Whether this is true is up for debate.
However, if you’re good enough and have the proper technique (which you probably are because you’re interested in making a custom table tennis racket), then you should notice little difference. Even so, the rules are that you need red and black rubbers.

What Are Pips On Ping Pong Paddles?
The pips are the small protrusions that give the rubber its textured surface. Some are long and some are short depending on your style of play. They’re also sometimes called “pimples”. The next thing to think about is how you want the rubbers installed. Do you want the pips facing inward or outward?
Each rubber has a pimpled side and a smooth side. It’s up to you which one you want to play with. Attach the smooth side to the sponge and you’ll be playing with the pimpled side. Attach the side with the pips, and you’ll be playing with the smooth side (good for spin).
It’s up to you and how you play. Some players have smooth rubber on one side and a pimpled side on the other. So, there are many different combinations to try.
If you’re playing with one or two sides with pimples out, then you’ll want to choose between long pips or short pips.
Long pips are used for a more defensive game where you are countering topspin and backspin shots from an aggressive opponent.
Short pips are the opposite and tend to play in a more offensive-minded way – creating fast rebounds and power.
Related: Click here for the ultimate guide to illegal ping pong serves.
How To Build Your Own Ping Pong Paddle Step By Step
It’s definitely possible to build your own ping pong paddle from scratch complete with cutting and using your own plywood. Here’s a great guide on how to do so.
However, we’re going to assume you have your blade and rubbers already picked out and ordered, now it’s just a matter of putting them together. You will need table tennis glue; it is specially formulated to work with your rubbers. If you try to use other types of glue it will not hold properly. I do NOT recommend this!
Use a small sponge to spread a thin layer of glue on your rubber and allow it to dry. Not waiting for it to dry can impact how well everything holds together, so don’t get impatient – wait for EVERYTHING to dry properly.
New rubbers are going to be more absorbent than you’d expect so it’s going to take two layers of glue. So, allow the first layer of glue to dry. It should still be a little sticky to the touch. Next, apply a second layer. Remember that you can always add more glue if needed.
While you’re waiting, sweep any packaging debris or dust off your blade, put a thin layer of glue on it, and let that dry. This shouldn’t take more than fifteen to twenty minutes as long as you don’t overdo it.
Then apply the glued rubber to the blade, ensuring that it adheres to it correctly. Now, take a sharp pair of scissors and cut around the blade so the rubber matches the blade shape.
Repeat the entire process for the other rubber. If you try to attach both of them at once, it will be tricky to cut them properly. This is not ideal. Trust me, do one side of your paddle at a time.
After both sides of the blade are covered and the glue has set, place it on a flat surface and put a heavy object on top to compress it further.
My Recommended Products For Building Your Own Ping Pong Paddle
Ok, let’s get into what products to select. There are many, many different mix-and-match combinations from loads of manufacturers, so choosing where to begin can be overwhelming. When in doubt, start simple and choose quality materials.
That’s what I did. I could have spent three to four hundred dollars putting together a custom ping pong paddle but I wasn’t ready to create my version of a tournament-ready Excalibur…at least not yet.
So, if you’ve never done this before, I recommend starting somewhere in the middle. The sweet spot (no pun intended) for your first custom ping pong racket is somewhere ahead of a really good premade ping pong paddle, and below an elite custom racket.
In my opinion, that’s a good place to start. And these are the products that will get you there.
Best Ping Pong Blade Under $150
For the best Ping Pong Blade under $150, in my opinion, you’ll want the Butterfly Viscaria paddle. This paddle features a carbon-poly fiber and plywood construction, giving it loads of extra power! If you’re a player that likes to put speed and power into your shot, the Butterfly Viscara is right for you.

It is heavy and relatively inflexible, so it sends balls in a flatter arc – provided you have good table tennis fundamentals. Novice players will struggle to control this paddle. However, if you have a solid attack technique, this paddle gives you ample speed and power that will overwhelm an unprepared opponent and is well worth the price.
Pros
- Well-suited for straightforward attacking players
- Robust construction and durable materials
Cons
- Not forgiving for errors in fundamentals
- Harder to loop and impart spin on the ball
Best Ping Pong Blade Under $100
Need something with a lower price point or a different play style? Look for the Joola Rossi Emotion. The main draw of this blade is that it has a penhold handle, making it best suited to players with a penhold grip.
The penhold grip places the index finger and thumb on one side of the paddle so that only one side is used. It’s harder, and more unpredictable because most players use a handshake grip.

The blade is made of five layers of plywood coupled with two layers of veneer. The relative thickness leads to more power without sacrificing control. Its main disadvantage is that it’s not suited for defense. It’s purely an offensive geared racket.
The layers of carbon increase the optimal striking surface of the blade, so it is a little more forgiving to newer players who haven’t gained the most precision yet. The penhold grip will take some getting used – so be patient if you’re trying that style for the first time.
Pros
- Suited for penhold grip
- Larger striking surface than others
- More forgiving to new players (this is ideal for first-time custom bat users)
Cons
Best Ping Pong Blade Under $50
If you’re really on a budget, check out the Petr Korbel. This blade, unlike the others on this list, does not have any augmentation to the material. It is pure plywood, which makes it a little stiff, powerful and appealing to people who prefer simpler aesthetics.

The flared handle lends itself well to penhold and shakehold grips, so no matter which style you learned you’ll be able to use this blade. Like the other blades we’ve seen, this one isn’t ideal for defensive-minded players.
Pros
- Designed for penhold grip
- Large striking paddle surface
- More forgiving to new players
Cons
The Best Table Tennis Rubbers to Consider
The Tenergy 05 rubber sheet can compensate for many weaknesses of a stiff blade. It has proprietary sponge technology that is able to compress and keep the ball on the paddle for longer periods of time – perfect for spin!
This imparts an unpredictable spin on the ball and can throw opponents off their rhythm! However, the extra springiness can make the ball move too fast for players to control until they get used to it.
Pros
- Adds unpredictability to the shot
- Compensates for stiffness in some blades
Cons
Best Affordable Ping Pong Rubber
If you’re someone who’s just starting out or who’s on a budget, the Mark V Yasaka might be a great choice. It uses speed glue technology, which, while outdated by later models can still hold up. This rubber has a good all-around performance profile.

It works well for power, spin, and control, so using this on a blade allows new players to become acquainted with their playing style. Serious players who are looking for characteristics that stand out might want to try another rubber.
Pros
- Decent performance in all areas
- Reliable construction
Cons
How Build A Ping Pong Paddle – Final Thoughts
If you’ve never assembled you’re own custom table tennis paddle, you’re not alone. Many ping pong fans like myself were unsure where to start, how to do it, and what products to choose. I hope the walk-through has given you confidence, direction, and some buyer knowledge to get you off to the right start.
If you’re unsure which blade and rubber combo to go with, I’d recommend starting more on the basic side and NOT get a blade and rubber that will be too fast and too difficult to control. That’ll make the whole experience for you a negative one and you’ll wonder why you even ventured away from your classic premade paddle.
So, start simple, assemble a custom ping pong paddle that’s tailored more towards your current skill level versus one that you’re hoping to get to. Good luck!

Welcome to TheVolleyLlama.com. My name is Keith, I’m just a lover of all sports that involve a racquet, net and a ball. I played competitive high school varsity tennis, love racquetball and my whole family plays pickleball regularly. I started this website to help give people like you the basics to learn these wonderful games.

