Pickleball has positively exploded in popularity across the world in recent years, even a pandemic hasn’t slowed down its growth. Part of what makes the sport so appealing is that anyone with access to a tennis court can play it. But, do you have to lower a tennis net for pickleball? And more importantly, how do you lower a tennis net for pickleball?
It is recommended to lower a tennis net when playing pickleball but only by two inches. Sliding the center strap left or right a little is the easiest way to adjust a tennis net for pickleball and when done right, it should only take about 30 seconds to do. And, it’s easy to put back in place.
I’ll get into the proper steps for lowering a tennis net to play pickleball but rest assured most of the time, it doesn’t require any fancy tools or strenuous adjustments to the side posts. It’s all about the center strap and it’s (the majority of the time) very simple.
But…Can You Use A Tennis Net For Pickleball?
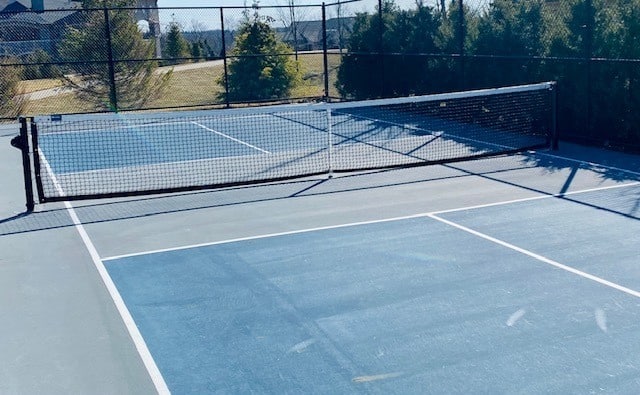
Yes, you can use a tennis net for pickleball. In fact, playing pickleball on a tennis court is one of the most common ways to play pickleball for the first time.
So using the tennis net is allowed, and works perfectly when adjusted from 36 inches to 34 inches from the center using the tennis net’s own center strap.
Let’s get into the simple steps for lowering a tennis net for pickleball so you can easily convert your local tennis court net in your neighborhood or local park to the proper height for pickleball.
6 Easy Steps For Lowering A Tennis Net For Pickleball
Below you’ll find my six simple steps that I take when having to lower a tennis net at a local park in order to play pickleball. Six steps may sound like overkill but when doing it for the first time, especially at a local park or tennis court used by the public, it’s important to follow the rules of the facility and do things the right way.
After readying through these steps, you’ll probably be able to narrow it down to just two or three steps depending on where you live and play. For the benefit of first-timers, I wanted to cover the topic as thoroughly as possible.
1. Ask Permission To Lower The Tennis Net
It may sound like a no-brainer, but the first step in lowering a tennis net for pickleball is to actually ask for permission. It may sound silly but pickleball etiquette is a real thing.
And part of that etiquette is to be respectful to the facility you’re using.
This is most common at a local park or neighborhood tennis courts.
If you’re at a local park, see if any one is at the admin building or info booth and ask permission.
If you’re at a neighborhood park, I’d check in with the attendant at the welcome center or club house.
I’d advise that you tell them what you’d like to do, and that you’ll put the tennis net back to its original height when you leave and absolutely no damage will be done to the net.
It’s important to let whoever you’re speaking to know that tennis nets are designed for this sort of thing and that it does not require any major adjustments to the side posts (usually).
Once they realize that all it takes is a simple thirty second center strap adjustment and that you’ll make sure it’s back to normal when you leave, they’ll probably give you the ok.
Again, it’s a simple first step but it’s also the right thing to do.
2. Check To See If Your Tennis Net Is Adjustable
Most recreational tennis net will have a center strap running down the center of the net that is sometimes clipped into a hook coming up from the court. It’s a nylon strip with a hard plastic center that should move left or right along the line of the net at the top.
If your net allows for you to slide this strap left or right towards either post, then your tennis net is adjustable and 99% of the time, this is all you’ll need to check for.
Editor’s Note: If you notice your net is missing this strap in the center, don’t worry. They’re readily available online and easily equipped.
Nets also commonly sport net straps to alter height and tension in their center. These are threaded through the middle of the net and hooked to an eye bolt in the ground.
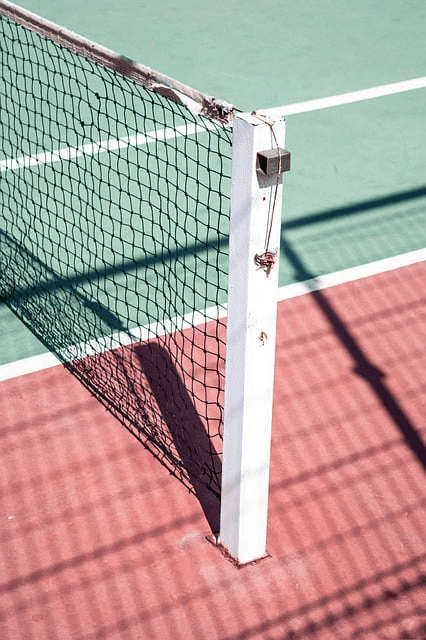
Some nets are more adjustable that others so keep that in mind. By that, I mean the side posts at the sidelines.
Some adjustable tennis net posts will sport a turnable knob or lever. Rotating this mechanism will lower or raise the net and increase or reduce tension. This will lower or raise the tension on the entire net, not just the center so I wouldn’t recommend messing around with these unless you absolutely need to. More on that later.
Some tennis posts, on the other hand, won’t inherently be adjustable. In these cases, you shouldn’t mess with the net posts without permission.
Editors Note: Don’t get intimidated by nets with giant side posts and levers etc. I almost didn’t even want to write about them in this article because 99% of time, messing around with them only makes the process more complicated and is almost always unneeded.
Altering the center net strap alone is often all you need to do. Don’t let your pickleball day be hampered because you can’t achieve “tournament approved- perfect net” heights.
3. Mark Your Boundaries Lines For Pickleball
You might be wondering what marking boundary lines has to do with lowering a tennis net before playing pickleball. But you won’t be able to get completely accurate measurements without doing so.
There are two reasons why you should mark the lines and lay your pickleball court before lowering the net. The first reason is because the boundaries of a pickleball court are significantly shorter than a tennis court.
16 feet shorter to be exact. 20 feet wide versus 36 feet wide.
The second reason is that regulation pickleball nets require two different heights, 34 inches in the center and 36 inches at the sides. It may not sound like much but this is significantly lower than a regulation tennis net which is 42 inches high at the posts and 36 inches down the middle.
Together, this means you don’t measure the net at the posts but rather the sidelines of your pickleball court you put down lines for. Thankfully, you’ll find that after the center strap is adjusted, the net will fall to the proper height of 36 inches at the sidelines of the pickleball court that you’ve marked.
Phew! Easy right?
Pro Tip #1: When marking lines, make sure your side lines for the pickleball court are nice and big. The easier it is to tell the pickleball court lines from the lines of the tennis court, the easier it will be for calling outs.
Pro Tip #2: You can chalk or paint temporary boundary lines on a court or utilize cones and plastic lines to delineate your pickleball court from the tennis court lines already there. Check out my helpful guide on temporary pickleball lines here. Or for a simple guide on permanent lines to make the court dual functional, click here.
4. Adjusting The Net Using The Center Strap
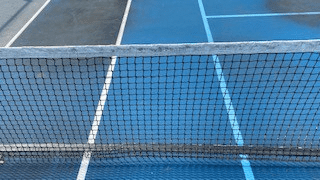
Lowering a tennis net for pickleball is easy! The quickest way to lower a tennis net to play pickleball is to simply slide the center strap left or right until the middle of the net is 34 inches from the ground. It only takes moving the center strap 2-4 inches to achieve this effect.
While you might be expecting a more “official” set of instructions at this point for this step, this is what most players and coaches do for recreational play at a park or local tennis court. And it’s usually all it takes!
However, if you’re a perfectionist and want to do more to get a more “official” height, then keep reading. Otherwise, for common recreational play, at this point, you’re done and you can start playing pickleball!
For those perfectionists – if the net has a strap hooked to the ground, and you’re willing to take a few extra steps, you can change its height and tension using the strap clips. And in the process a more official looking net can be achieved.
For most straps, moving the clips apart will increase tension and lower the net. Conversely, moving the clips together will loosen and raise it.
Moving the clips is easier with a second person gently pushing on the top of the net. With that in mind, adjust the strap and bring your center net height down to 34 inches.
But what about the side posts?
The reason we start with the center strap is because adjusting the straps and clips or even the side posts isn’t usually necessary. Check your net height at the sidelines (of the pickleball court inside your tennis court) to see if they’re already approximately 36 inches high.
Chances are, they will be. The net will generally fall to the proper height and you’ll be done.
If the sides are nowhere near 36 inches, you may need to adjust the tennis net side posts’ height and tension, but this rare. Very rare.
To do this, turn the crank if one is attached or equip a wrench for knobs or bolts without levers.
Either way, get permission to adjust the side posts before you do anything because this step can be more involved.
Again, it’s worth reiterating – adjusting the cranks and bolts at the side posts is usually never necessary. I’ve been playing pickleball for 6 years and I’ve NEVER had to do it at my local park.
Even adjusting the center strap using the clips that some nets come with is rare because almost all tennis net center straps have the ability to slide left or right a little.
And a little is all you need.
5. Why Adjusting The Side Posts Isn’t Usually Necessary
Once you’ve slid the center net strap over to the left or right, the proper tension on the net should not only bring the center down to 34” but that should also bring down the sides (by the sidelines of the pickleball court) to the correct height as well.
Remember, in pickleball the center of the net should be 34 inches high but the side post height should be slightly higher at 36 inches.
But when you’re playing pickleball on a tennis court, the actual posts of the net come out way beyond the sidelines of the pickleball court. So, adjusting the side posts of a tennis net won’t necessarily help bring down the net to proper pickleball heights. Which is a good thing because adjusting the side posts can be more complicated.
Here’s the good news.
When lowering a tennis net for pickleball, no side post adjustments to the tennis net are usually needed because adjusting the center strap will bring the net down at the sidelines of the pickleball court to the proper 36 inches.
Because the court lines for pickleball are smaller and inside the tennis court, after you’ve adjusted the center strap to 34 inches, the net should fall to it’s regulation height of 36 inches at the sidelines of the pickleball court and then gradually taper out higher to the posts of the tennis net.
Which is fine because by the time the net gets higher towards the tennis net posts, the net falls outside of the pickleball court lines. Meaning it’s out of bounds for pickleball.
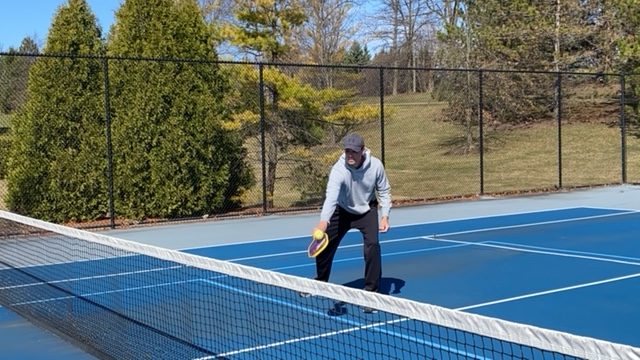
6. Measure The Net Height Using A Tape Measure
The sixth and final step to lowering a tennis net for pickleball is to grab your handy tape measure or measuring stick and admire your ingenious handy work.
Start at the top of the net at the middle and bring the tape measure down to the court. It should be physically touching the court.
If your tape measure is at 34 inches – you’re good to go.
If you need to make some small adjustments, grab a friend and have them hold the tape measure while you make the slight adjustments to the center strap until 34 inches is achieved.
Moving the center strap a little more left or right should solve this problem in no time.
Other Important Considerations:
Ensure the Net Has Good Tension
Before you begin playing, check that the net has proper tension. It shouldn’t hang too loose over itself (a slight center sag is okay) or be so tight that it doesn’t give when you tug on it.
Heavily used nets can become stretched or torn. I’ve seen this at my local neighborhood court many times.
Unfortunately, these damaged nets may have a difficult time balancing tension and height.
If that’s the case, adjust the best you can, but don’t obsess over having perfect conditions. What’s most important is that you enjoy your time and get to practice.
You’ll still have fun and improve even if your net isn’t tournament ready.
Readjust The Net When You Leave
Be courteous! If you altered a tennis net to enjoy pickleball, revert it to its standard height when you finish. Take care to readjust both the center net strap and any other parts of the net if you’ve changed.
The process should only take you a couple of minutes and might save others some frustration.
As pickleball grows in popularity, we must show that the sport can coexist on a tennis court and vice versa. If pickleball players treat the tennis court with respect, we’re headed in the right direction and we all win.
Portable Net Alternatives
If you’re having trouble changing your net’s height (or aren’t allowed to), you could consider buying a portable pickleball net.
Portable pickleball nets are ordinarily simple to set up, lightweight, and come in various colors and designs.
I’ve compiled a short list below of the easiest portable pickleball net systems I’ve used and played with. These are the only ones I recommend (based on my own use) if you’re considering buying a net as an alternative to adjusting the net at your local tennis court.
- The PickleNet Pickleball Net System: this is the net I use when playing some driveway pickleball and it takes me at most 5 minutes to set up all by myself.
- 3.0 Portable Pickleball Net System: this is another great portable net system I’ve seen used at Rec Centers all over the place.
- Onix 2-in-1 Portable Pickleball Net: This easy to use system from Onix is another one I recommend because it’s durable and made by a highly thought of tennis brand in Onix which is quickly making a name for itself in the equipment arena for pickleball. I don’t necessarily love their paddles but their nets and balls are outstanding!
Necessary Tools To Lower A Tennis Net For Pickleball
What tools do you need to lower a tennis net when playing pickleball? Well, all you really need is one: a tape measure! That’s it! To be safe here are a few others to cover most of your needs:
- Tape measure or measuring stick (necessary)
- Adjustable wrench (usually not necessary)
- Spare net strap with snap hook and carabiner (usually not necessary)
The tape measure ensures your height alterations remain accurate. For convenience, you could also pre-mark a measurement stick with the heights you’ll need (34 and 36 inches).
Pro Tip: A sturdy measuring stick could be easier to handle solo than trying to balance a tape measure.
Another helpful item to keep on hand is a spare center net strap. Public locations often see these stolen or damaged, so having an extra will prevent that unfortunate reality from getting in your way.
How To Lower A Tennis Net For Pickleball – Conclusion
Lowering a net for pickleball is a straightforward process and should only take you a few minutes.
As I’ve outlined, about 99% of the time, all you need to do is check that the center strap on the tennis net is adjustable and slide it left or right until a height of 34 inches is achieved.
Most local parts or faculties will have nets that allow for this so all that’s left is to get permission and start playing!
Playing pickleball on a tennis court is the most common way most new players learn about the game so using the tennis court’s net is common practice.
Just lower the net and off you go! Now get out there and have some fun!
Welcome to TheVolleyLlama.com. My name is Keith, I’m just a lover of all sports that involve a racquet, net and a ball. I played competitive high school varsity tennis, love racquetball and my whole family plays pickleball regularly. I started this website to help give people like you the basics to learn these wonderful games.
